

![]() Attach
|
Attach
|
![]() Edit
|
Edit
|
![]() Revisions
Revisions
![]() Related Content
Related Content
Casio Exilim EX-S10 Disassembly
It's fairly easy to take the Casio Exilim EX-S10 apart. You'll need a small #000 precision philips screwdriver to remove it's miniature screws. Other than that, it's a matter of unlocking the Chinese puzzle. This article will show you the way.
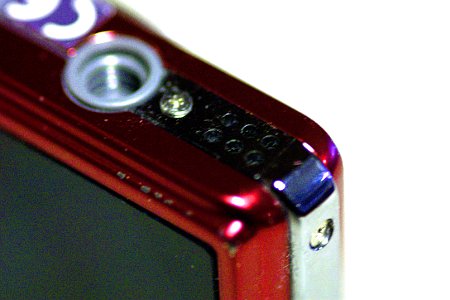
Start by removing all of the precision screws that you can see on the outside of the camera. There are a few on the two sides. And several on the bottom. The photo below shows a screw on the bottom of the camera and a screw on the side of the camera.
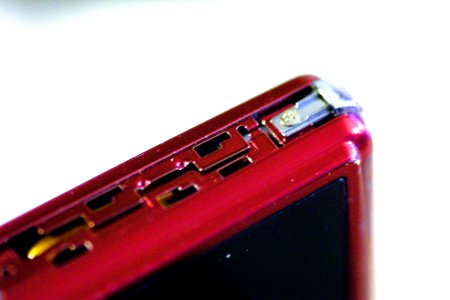
After removing all of the visible screws on the exterior, look at the non-wrist strap side. Slide the chrome panel downward to unlock the first part of the Chinese puzzle. Then remove the side panel. After you do so, you will see a hidden screw that holds the top power panel onto the camera (see photo below). Unscrew that screw.
After unscrewing the hidden screw, side the top power panel out (see photo below). Then remove it. Be careful not to loose the power button that is attached to the panel.
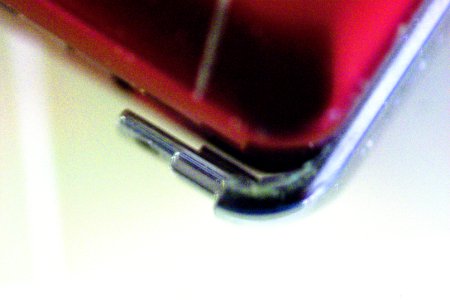
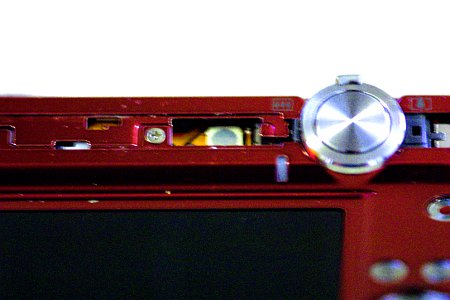
You'll see another hidden screw next to the power button at the top of the camera (see photo below). Unscrew that screw.

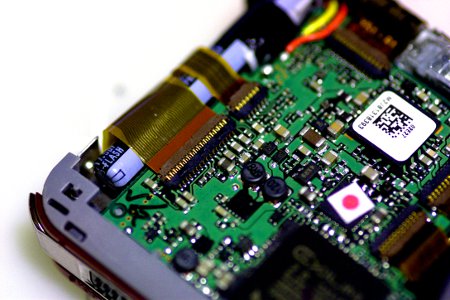
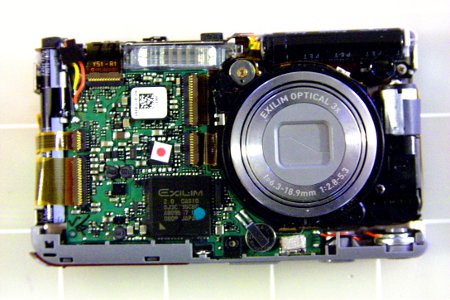
With the top precision screw removed, you can pull the front and back cover off the digital camera to reveal the internal electronic components. The photo below shows the front interior.

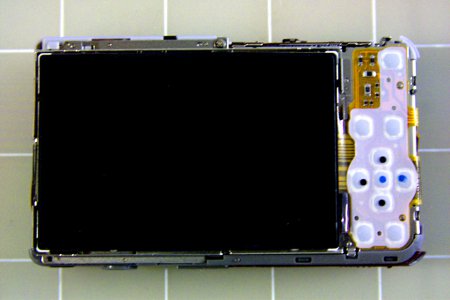
The photo below shows the interior of the back, where the LCD resides.
With the back cover off, the LCD is not secure to the camera at all, be careful you don't let the LCD drop out of the camera and rip the ribbon cable. The wide ribbon cable on the front of the digital camera (see photo below) is the only mean of attaching the LCD to the camera.
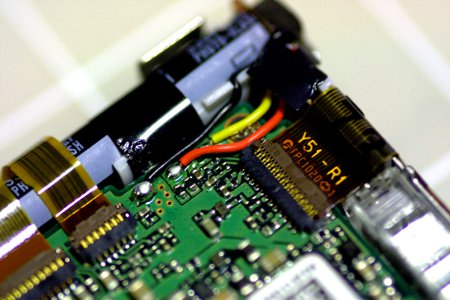
The power wiring is soldered onto the circuit board between the flash and the capacitor, as shown in the photo below. It's relatively easy to tap into the power source from this location. Just make sure you use a low wattage soldering iron to prevent burning out the electronic components around the wires.

Request for Help
This is as far as we got to disassemble this digital camera. If you continue past this point, please update this wiki with your progress.
![]() Attach
|
Attach
|
![]() Edit
|
Edit
|
![]() Revisions
Revisions
![]() Related Content
Related Content
Attachments
- Bare Camera without Covers (Back).jpg (18 KB)
- Bare Camera without Covers (Front).jpg (38 KB)
- LCD is Attached to the Camera via the Wide Ribbon Cable.jpg (38 KB)
- Power Wires Next to the Flash.jpg (35 KB)
- Screw Securing the Power Panel.jpg (16 KB)
- Screw Under the Power Button Panel.jpg (23 KB)
- Screws Securing the Side Panel.jpg (22 KB)
- Sliding the Power Panel Off.jpg (17 KB)
- Thumbnail.jpg (6 KB)
417 Users Online
|
Get Our
$10000-above $5000-$9999 $2000-$4999 $1000-$1999 $500-$999 $200-$499 $100-$199 $50-$99 $25-$49 $0-$24 Gift Certificate 
|
|


