
![]() Attach
|
Attach
|
![]() Edit
|
Edit
|
![]() Revisions
Revisions
![]() Related Content
Related Content
Set Up GeoTag to Add Location to Your Photos
It's quite fun, exciting, and memorable to keep track of where your photos are taken. A handful of digital camera have built-in GPS today. Many high-end SmartPhones, such as Android and iPhone, already track location on every photo taken with its build-in camera. But if your camera doesn't already track location, you can still track your location with a separate GPS. For example, you can use your Android phone track as shown in our "How to Use GPSLogger to Track Photo Locations" article. Once you have the GPS location file, you can use it to geotag with your photos. This article will help you set-up your computer to geotag your photos based on GPS logs. After setting up your computer to geotag, read the "How to Add Location to Your Photos with Geotag" article to start geotagging your exciting photo adventuress.
Note
This article is currently written for Windows users. In the future, we may expand this article for Mac users or write a separate article explicitly for Mac users.
Setting Up Java Runtime Environment
Before you can geotag your photos, you'll need to set-up the Java Runtime Environment (JRE). That is because the "Geotag" software you will be using to geotag your photos requires JRE to run. Luckily, it's not too hard to set-up JRE. Follow the instructions in the "Easiest Way to Install Java for a Browser" article to set-up JRE.
Setting Up ExifTool
The "Geotag" software also need the ExifTool to write the GPS coordinate into your photographs. ExifTool is a separately downloadable software, so you will need to get it. You can get the ExifTool on the ExifTool by Phil Harvey web site.
At this writing ExifTool is version 9.37. So, you will download "exiftool-9.37.zip" from the web site. For the sake of simplicity, you will save the file to your desktop (or your browser's download directory). After saving the ZIP archive, open it to find "exiftool(-k).exe". Drag this binary executable to the desktop. If you are an advanced user, you can drag it anywhere. But for this article, we'll use to the desktop. You can delete the ZIP archive once you have extracted the binary executable.
Setting Up Geotag
There are two ways to run "Geotag", the software you will use to geotag your photos. One way is to use the online version. This version is advisable if you are on a home desktop computer and will always have Internet connection. Because you are running the online version, you will always get the latest update every time you run it.
The online version is not advisable on laptops that you carry on your photo trips. It's likely possible that you will not have Internet access and would prefer to run "Geotag" offline. This article will show you how to set-up either version for your needs.
Launching the Online Version
If you prefer to set-up the online version, following the instruction in this section. Otherwise, move on to the next section for the offline version.
Launching the online version of "Geotag" is very easy. Simply navigate to the online version web page (see screen shot below).
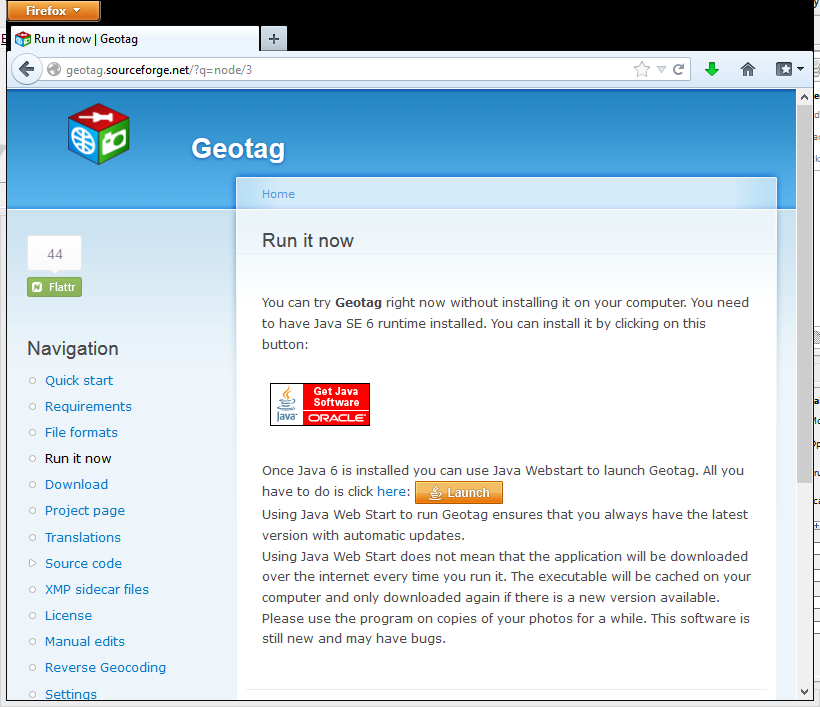
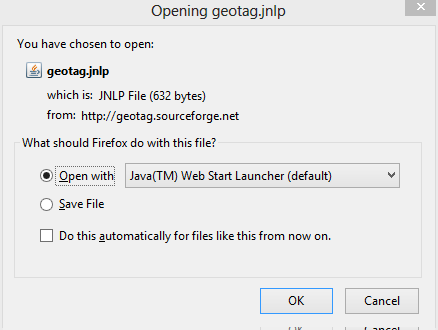
Once you have that web page open in your browser, click on the "Launch" button. You'll be present with the "Opening geotag.jnlp" dialog (see screen shot below).

Select "Open with Java(TM) Web Start Launcher (default)". Then press the "OK" button. Your browser will attempt to download "geotag.jnlp". After downloading it, it will give you a security warning as shown in the screen shot below.
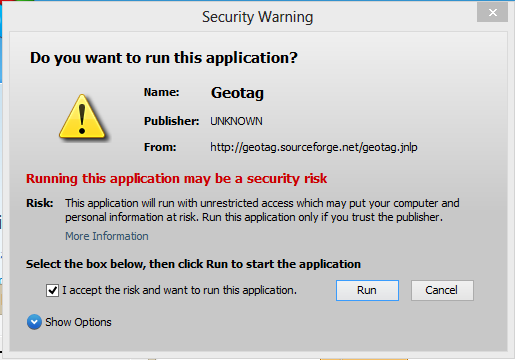
Check the box for "I accept the risk and want to run this application." Then click the "Run" button. "Geotag" will run and present you with the "What next?" dialog as shown in the screen shot below.
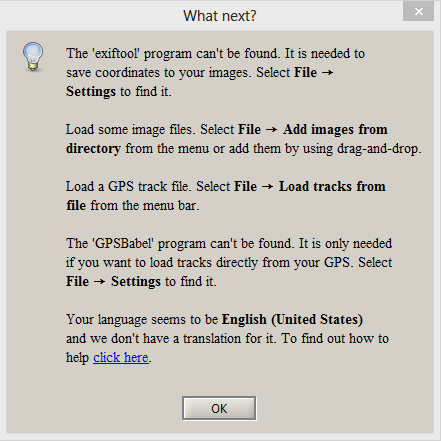
Don't be too concerned with this dialog box. We'll show you how to set-up the online version in the "Telling Geotag the Location of ExifTool" section below.
Setting Up the Offline Version
Setting up the offline version is not much harder than installing the ExifTool. In fact, it is slightly easier. Download the latest version of "Geotag" from its SourceForge files web page. As of this writing, it is version 0.086. So download the "geotag-0.086.jar" file.
Once you have downloaded the file, it will probably be stored in your browser's download folder. Open that folder and move that file onto the desktop for easy access. Launch "Geotag" by double-clicking on that file. "Geotag" will run and present you with the "What next?" dialog as shown in the screen shot below.
Don't be too concerned with this dialog box. We'll show you how to set-up the online version in the "Telling Geotag the Location of ExifTool" section below.
Telling Geotag the Location of ExifTool
In this section, you will change the Geotag setting so that it has access to the ExifTool.
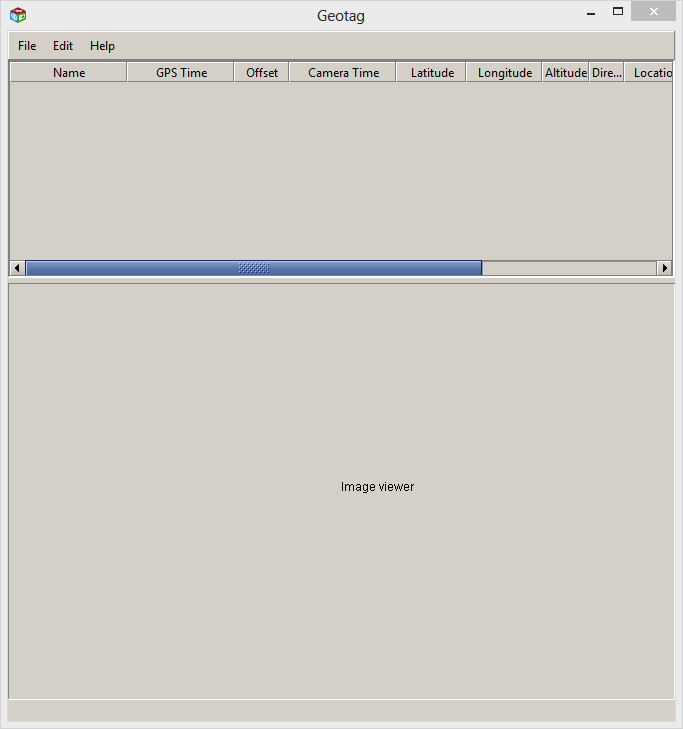
After executing the "Geotag" software (either online or offline), you'll be presented with the "What next?" dialog. Click the "OK" button to dismiss it. You'll be present with the Geotag user interface (shown below).

Click the "File" menu and select "Settings...". Once the "Settings" dialog is open, click on the plus ('+') symbol next to "External programs". Then click on the plus symbol next to "Exiftool". Finally select "Exiftool path". At the bottom of the screen, click the "..." button to bring up the file selection dialog. Now, navigate to the desktop and select "exiftool(-k).exe". Press "OK". You should have set the Exiftool path as shown in the screen shot below.
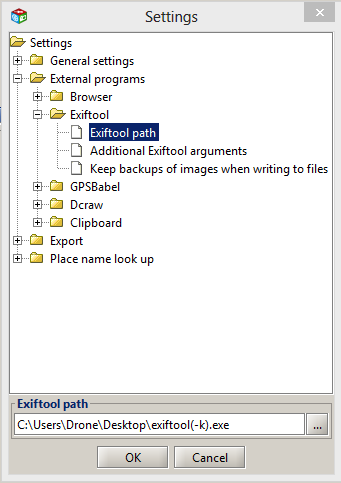
Click the "OK" button to save your changes. Now Geotag is ready for use.
Related Links
![]() Attach
|
Attach
|
![]() Edit
|
Edit
|
![]() Revisions
Revisions
![]() Related Content
Related Content
Attachments
- Geotag Java Webstart.png (74 KB)
- Geotag Settings.png (14 KB)
- Geotag.png (8 KB)
- Opening geotag.jnlp.png (12 KB)
- Security Warning.png (23 KB)
- What's Next.png (24 KB)
- thumbnail.png (8 KB)
388 Users Online
|
Get Our
$10000-above $5000-$9999 $2000-$4999 $1000-$1999 $500-$999 $200-$499 $100-$199 $50-$99 $25-$49 $0-$24 Gift Certificate 
|
|


