Making a Pinhole Lens for SLR Cameras
|
Published!
This article has been refined, clarified, and published with greater detail in the Hacking Digital Cameras book. Hacking Digital Cameras is published by Wiley under the ExtremeTech series of books. With ExtremeTech books |

|
Although this article uses the Canon EOS SLR as basis, the same concept can be applied to any SLR camera from any manufacturer (Nikon, Olympus, Pentax, Kodak, Sigma, etc.) with a body cap.
Art and Process
Ever since I started learning about photography, I have been fascinated with the art of pinhole photography. I always thought that the possibility of creating an image using the tiniest hole is amazing. If you are unfamiliar with pin-hole photography, see my related links section; I have added some links about pinhole photography for your wandering minds.
Despite my fascination, I have never involved myself with pinhole photography. I read about how to make a pinhole camera out of a 35mm film container. Although the process of making the camera is easy, loading and processing the film is extremely cumbersome. In fact, to use it, one frame of film has to be loaded in the dark, exposure has to be calculated, picture has to be exposed by uncovering the pinhole, pinhole has to be covered, and film has to be unloaded in the dark. All that work for a single exposed frame. But that is not the end, because the frame will have to be processed a personal darkroom, since it is extremely hard to find a place to process 35mm films one frame at a time.
I have always thought, "wouldn't it be nice if I can have a pin-hole camera that has built-in exposure meter, uses 35mm film roll, and comes with auto film winder?" Then I can concentrate on creating pinhole art, instead of concentrating on the processing of creating pinhole art. After a few years (yes I am a tad slow) I thought, "wouldn't it be nice if I can have a pin-hole lens on my EOS camera that has auto-exposure, uses standard 35mm film, and has automatic film winder." Wow!
Making the Lens
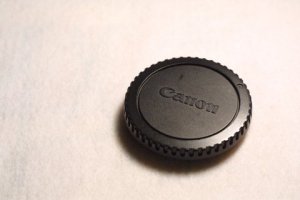
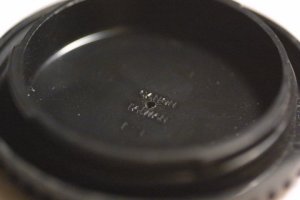
The material needed to make this lens is extremely inexpensive and affordable. In fact, I had heard someone say that this is the "cheapest lens available" for a SLR camera. I agree, considering that the only material needed is the body cap for a SLR. Some of these caps can be found for a dollar or two dollars in the clearance bin. In fact, that is where I picked up mine. In this article, we will work on a Canon EOS body cap, thereby, creating a Canon EOS Pinhole Lens.
The first thing we need to do is to find the center of the lens cap. The center is where the pinhole will be located. In theory, if you draw two lines, each line cutting the circle into two exact half's, the intersection of the two lines mark the center of the circle.
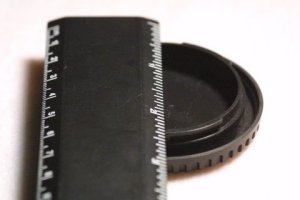
I started by moving the ruler across the lens cap horizontally, looking for the diameter of the lens. I found the diameter to be about 2.5 inches or 64 mm. Yes, I know the measure between English and metric is off by 0.5 mm. But my tool-the ruler-is imprecise and I got it free from a college career fair, six or seven years ago. Whatever . . . my point is "use a ruler." I drew a straight line through the lens cap with a pencil.
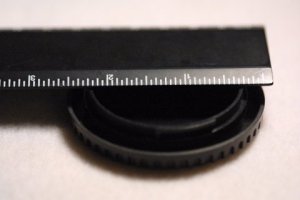
Do the same to get the horizontal line. The center is where the horizontal and vertical lines intercept.
Once the center has been determined, it is time to drill the pinhole. I used the smallest drill bit to start the hole. From inside the lens cap, drill a hole down to the other side, but do not drill all the way through. The smallest drill bit can make a hole far too big for our purpose.
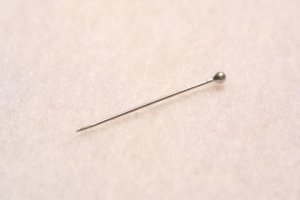
I used the smallest drill bit in my collection to start the hole. But it is far bigger than a pinhole. So I got out my next tool, the shirt-pin. I buy shirts for my work and have tons of these pins lying around. I always wondered what purpose do they serve for me in the future. I have always been reluctant about throwing them away; afraid they may stab the trash man or other unfortunate souls. But now the shirt-pin serves a real purpose for me.
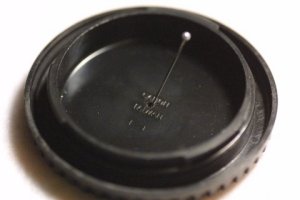
Using the pin, start working on the pinhole in the center of the drilled hole. Work slowly and keep the hole small. On the other side of the lens you will begin to see a little bump made by the pin. Start working on the other side of the lens by using the pin on the center of the bump. Thereby, resulting in a tiny pinhole.

There are many discussions on the optimal pinhole size to create the best pinhole image. I decide to forgo the precision, since if I really wanted optimal image quality, I would be using my Canon 50mm f/1.8 II lens. The whole exercise of this pinhole lens is for me to create interesting arts that are not so sharply produced by my regular lens with 90 (exaggeration!) lens elements to correct for aberration, distortion, etc., etc. If you want to calculate optimal pinhole size, see the "Frequently Asked Questions Regarding Lenses" in the Related Links section below.
Testing the Pinhole Lens
The pinhole is generally so small that not enough light passes through for you to see the image frame in the viewfinder. The only way to see if the pinhole covers the entire film frame is to point the camera and lens at a bright light source. I get up real close to the light bulb of a lamp. Examine the edge of the frame. If you can see distinct edge lines, then the frame is covered.

Focal Length
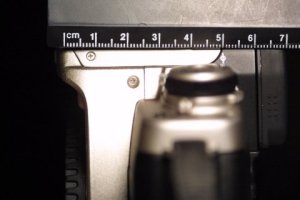
On the Canon EOS cameras, you can see a little mark. The mark indicates the position of the film plane. The focal length can be determined by measuring from this mark to the pinhole. The focal length of this pinhole lens is 50 mm.
Aperture
To calculate aperture, divide the focal length by the aperture diameter. The unit of the focal length and diameter must be the same. The result aperture number is unit-less, thus, referred to as the f-number, or f-stop.
             focal length
  f-stop = -----------------
           aperture diameter
Since I do not have a precise tool for measuring the diameter of the pinhole on my lens cap, I will estimate by using a ruler. It is about 0.2 mm. The distance of the pinhole to film plane is 50 mm.
            50 mm
  f-stop = ------ = 250
           0.2 mm
F-stop of 250 requires a lot of light to make an exposure. ;-) Enlarge the pinhole slightly if you do not want to wait so long for an exposure.
Digital
If you own a digital SLR, you will find that a pinhole lens is excellent tool to use when spot checking for dust on the digital sensor. With a regular lens and limited depth-of-field, specks of dust are usually blown out of focus to the point of not showing up in the picture. The large depth-of-field provided by the tiny aperture of a pinhole lens causes even the tiniest dust on the sensor to show up in the picture. Thereby, allowing you to detect dust for cleaning.

|
The black specks you see on the bottom portion of this picture is caused by dust on the digital sensor of my Canon D30 digital camera. |
Lens Comparison
One of the following pictures is taken with the EOS pinhole lens. The other picture is taken with the Canon EF 50mm f/1.8 II lens at f/22, the smallest aperture on this lens. Can you guess which picture is taken by which lens?

The picture on the left is taken with the Canon EOS pinhole lens. The picture on the right is taken with the Canon EF 50mm f/1.8 II lens set at f/22. Did you guess correctly?
Gallery
These images are produced with the EOS pin-hole lens.
Concrete
- Canon D30, EOS Pinhole Lens.
Floor Lamp
- Canon D30, EOS Pinhole Lens.
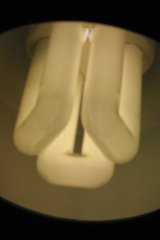
Fluorescent Bulb
- Canon D30, EOS Pinhole Lens.
Lamp Warning
- Canon D30, EOS Pinhole Lens.
Light Fixture
- Canon D30, EOS Pinhole Lens.
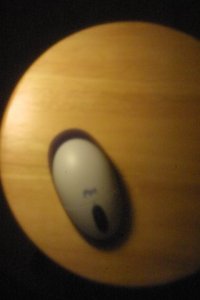
Mouse Close-Up
- Canon D30, EOS Pinhole Lens.
Mouse Front Quarter
- Canon D30, EOS Pinhole Lens.
Mouse Rear Three-Quarter
- Canon D30, EOS Pinhole Lens.
Tree Branches
- Canon D30, EOS Pinhole Lens.
Related Links
- Adorama Body Cap for all Canon FD Mount Cameras.
- Amazon User Reviews
- Adorama Body Cap for Canon EOS Mount Cameras
- Amazon User Reviews
- Building Your Own Swab/Swipe/Wand
- Canon RF-3 Body Cap for EOS SLR Cameras
- Amazon User Reviews
- Cigar box camera, Mk II
- Digital Pinhole Lens
- Digital Pinhole Photography Pin Hole Maxxum 7D Photo Dynax Photograph
- DIRKON ? THE PAPER CAMERA - make a pinhole camera out of paper!
- Focal Length & Magnification Factors
- Frequently Asked Questions regarding lenses
- Homemade Lens Part 1: EOS Holga
- How-To: 4 Camera Hacks You Can Do Today
- How to Make an Oat Meal Tin Camera
- Kodak: How to Make and Use a Pinhole Camera
- Marcy's Pintoid How-to
- Matchbox Pinhole
- NIKON BF-1A SLR Body Cap for Lens Mount
- Amazon User Reviews
- Pinhole FAQ
- Pinhole Gallery
- Pinhole Lens Attachment
- Pinhole (lens-less) Medium Format Cameras
- Pinhole Photography - History, Images, Cameras, Formulas
- Pinhole Resource
- Pinhole Spy Camera
- Pinhole Visions
- Worldwide Pinhole Photography Day
146 Users Online
|
Get Our
$10000-above $5000-$9999 $2000-$4999 $1000-$1999 $500-$999 $200-$499 $100-$199 $50-$99 $25-$49 $0-$24 Gift Certificate 
|
|