Photo Storage Solution
As digital image size increases with technology, digital photographers are starved with appetite for bigger and larger storage devices. Today, it's normal to have a 4 GB or an 8 GB Microdrive in you digital camera. You can still burn the photos on these drives to single-layer (4 GB) or double-lay (8 GB) DVD's. But flash memory storage devices are increasing in capacity much faster than the industry can rectify new DVD standards. Plus, after processing 8 GB worth of raw images into JPEG or TIFF, you won't be able to burn them onto a single DVD.
For five years, I have been burning photos to CD-R's and DVD-R's. Never had I generated this much data in the twenty years of using my computer. Currently, I have tons of discs. It makes my photo editing workflow very difficult, because I have to mount and un-mount many discs just to search for one photograph. After finding the image and working on it, I have to burn a new disc to store it. Finally, to achieve my backup philosophy, I'll have to burn two copies, one for on-site storage and one for off-site storage. Disc management became a chore. Automation is bottlenecked by manually swapping discs.
Tip
On-site storage is for quick and convenient retrieval of your data. Off-site storage protects your data from physical harm to your residence or business.
Recently, I came up with a new photo storage solution to meet the new demand. The solution uses two large removable hard drives. One drive serves as the on-site work drive, while the other drive serves as the off-site archival backup. By keeping all my photos on the same drive, I never have to swap discs to find a photograph. This system is also upgradeable and scalable, which I will explain later.

Following the philosophy outlined in this article, yon can also build you own photo storage solution.
Parts You Need
To build up this photo storage solution, you can buy off-the-shelf components and put everything together yourself. You can also buy two large pre-built external hard drives, but they are very expensive and there are fewer selections. The bare drives are generally larger and cheaper on the market. Plus, building the system yourself will give you a versatile upgrade path that this article will cover later.
- Seagate / 250GB / 7200 / 8MB / ATA-100 / EIDE / OEM / Hard Drive
- Kingwin KF-20 HDD Mobile Rack ATA 66/100
- Kingwin SB230 USB 2.0 Shuttle Base
- Maxtor / 300GB / 7200 / 16MB / SATA-150 / OEM / Hard Drive
- Kingwin KF-91 Black Aluminum SATA Mobile Rack
I chose to order a 250 GB and a 300 GB hard drives from TigerDirect, because they were on special promotion at the time. TigerDirect has tons of hard drive selections and have special promotions all the time, reducing the cost of purchasing large hard drives. Several months ago, when I sat this up, 300 GB hard drives were practically the largest they had available. Today, they have 400 GB and 500 GB drives. You are welcome to substitute any hard drive for this project.
I decided that installing two removable drive racks in my desktop computer is the best way to go, because it's easy to pop the drives in and turn on the computer. I don't have to mess with power and data cables that plague external drive cases. You are welcome to substitute external drive cases instead. I know USB/Firewire connectivity can be handy at times.
To gain the same connectivity as external USB/Firewire cases for my system, I chose to pick up a Kingwin SB230 USB 2.0 Shuttle Base. The Shuttle Base connects to the Kingwin KF-20 Tray and turns it into an external USB 2.0 enclosure. This adapter is very handy for me because my desktop is actually my full-blown PC game machine; I do all my work on my notebook computer. So I will actually use the work drive on my notebook through USB and only slide it into the desktop computer for backup.
Installation
The installation instruction will come with your particular hardware and your hardware choices will vary slightly from mine, so I won't go into details here. I will outline the concept so that you have an idea of how much work it takes to set it up.
Step 1: Installing the Removable Rack
If you have decided to follow my footsteps, then you will have to take your computer apart and install the two removable racks. If this sounds like too much work, you can go the easy route of substituting external cases. Using the external cases, you won't have to take your computer apart and you can safely skip this step. But choosing the removable rack route has some benefits, like not having to deal with wires every time you want to back up to the archive drive.
Start by taking your computer case apart. It's much easier to get inside today's computer case compared to years ago. The side panel is usually held on with two screws on the backside of the case. After unscrewing these two screws, you can slide the panel off. Some cases, like the one I have at home only requires you to take apart one of the two panels to install a drive. The other type requires both panels to be removed.
After removing the side panels, note how many 5-1/4" drive bays are empty. You'll need two bays, one for each removable rack. Before installing the rack, look at the connectors and cables you have for your drives. Plan the cable route and eyeball the cable length. Can you reach the removable racks from the hard drive controller (most motherboard today have hard drive controllers on the motherboard)? Will the cables block airflow? Use the information you gathered to plan which removable rack is best suited for which drive bay.
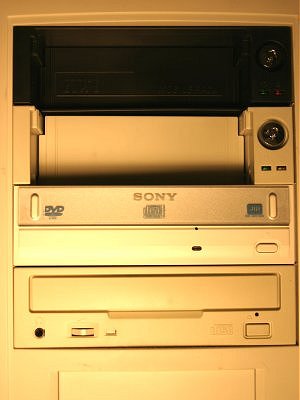
Once you have everything planned and acquired all the necessary cables, you are ready to install the racks. Pop off the front faceplate for the two empty bays you choose and slide the removable racks into the bay. Picture belows shows two removable racks installed in the bays. Connect the data cables from the hard drive controller to the removable racks. Finally connect the power cables to the racks.
At this point you are done and could put the case back together. However, in my experience, the installation never works the first time. I always forget a cable or one of the connector has a loose connection. If I was to assemble the case before testing my installation, Murphy's law is guarantee to come into effect and I'll end up taking apart the case again. So you might consider testing your set-up before putting everything together.
Step 2: Install the Hard Drives into the External Case
Whether you decide to go with the removable racks or the external USB cases, this step applies equally to both. It's also one of the easiest installation steps in the process, because you don't have to bend over, twist your hands and fingers in the confined space of your computer case. You could have the external drive case sitting on your desk, while working comfortable on them in your chair.
Most external drive cases are extremely easy to take apart. There are generally four screws holding the case together. Just unscrew the four screws and you're in the case. There are probably four more screws holding the hard drive securely within.
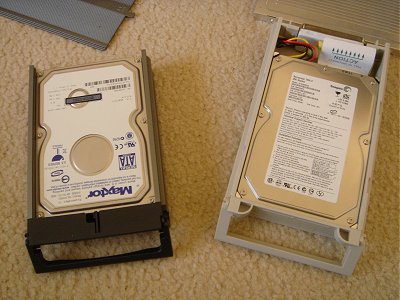
It's even easier to get inside the removable trays if you go with the removable racks. Their cover simply slides off the top (see picture below). Install the hard drive, plug in the cables, and screw two screws into each side and you are done.
Step 3: Connecting the Hard Drives
After installing the hard drives into the external cases, it's the time to connect them to your computer. With the removable drive tray, it's a piece of cake. Just slide the removable trays into the removable racks and secure them into place with the handle. But you also have to use the key to lock them before they will power up with the computer. When I first installed them, I didn't realize that the key is a critical power disconnect and couldn't figure out why the drives won't power up with the computer after insertion into the rack. It's convenient that the keys for both racks are exactly the same. Now I keep a key by the computer.
If you went with the external case route, you'll be dealing with two simple wires for each case. One wire is the data cable that connects to the data port on your computer. The data cable could be USB, Firewire, or some other technology, that you chose. The other cable provides power to the external case. Plug one end of the data cables into your computer and the other end into the drives. Now, plug the power supply cable into the external cases and the power plugs into the wall outlet. Some cases have the power button, other power up as soon as you plug them into the wall. Your computer should see the drive after booting up.
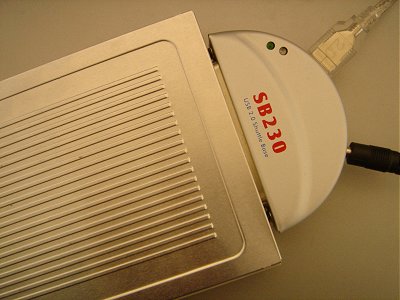
The picture below shows the USB data cable and power cable connected to the Kingwin SB230 USB 2.0 Shutter Base. The shutter base connects to the Kingwin KF-20 Removable Tray and turns it into an external USB case.
Upgrade Path
So now that you have an idea how to get started in assembling your own photo storage system, what are your upgrade options? You know you'll eventually fill the hard drives up, which would put you in the same state as you started. If so, why is this solution better than backing up to discs?
Hard drive technology currently advances much faster than CD/DVD technology. Where CD/DVD are merely doubling their capacity every few years at 1 to 4 GB rates, large hard drives are increasing capacity at 100 GB rate, in a time-frame of every few months up to a year.
Hopefully, by the time you fill up the current solution, new drive capacity will exceed your needs. If not, see the "Scalability" section below. Upgrade is relatively simple by following these steps:
- Buy two larger drives than the two current drives in your storage solution
- Backup your on-site working drive to your off-site archival drive
- Disassemble and replace your working drive with new drive (just four screws)
- Copy your data from your archival drive to the new drive
- Disassemble and replace your archival drive with new drive (just four screws)
- Backup your on-site working drive to your off-site archival drive
Scalability
So what if you are a master photographer and 500 GB of storage space is not enough? Good news is that this photo storage solution is scaleable. You can buy two more 500 GB hard drives (one for on-site, one for off-site) and two more removable trays.
- Kingwin KF-20 IDE Mobile Rack Insert Tray Only
- Kingwin KF-91 Black Aluminum SATA Mobile Rack Tray (Tray Only)
But isn't this scalability the same as CD/DVD? Yes. But you are now working with 500 GB worth of data, rather than 4 or 8 GB or data, at a time. Which storage media type would you rather work with? Which choice lets you move more data with less human supervision?
Transfer Speed
In order to make the right decision on your own photo storage solution, you should take a look at the transfer speed of the technologies available today. Will USB hard drive be fast enough for you? Or should you go with SATA? That depends on your backup/restore pattern, and how much data you access regularly. The following is a chart showing the technologies available today and their burst transfer rates.
Bluetooth                    1 Mbps
USB 1.1 Bus-Powered          1.5 Mbps
802.11 Wireless LAN          2 Mbps
10Base-T LAN                10 Mbps
802.11b Wireless LAN        11 Mbps
USB 1.1 Self-Powered        12 Mbps
PC Card (I/O Byte Mode)     31.36 Mbps (3.92 MBps)
802.11a Wireless LAN        54 Mbps
802.11g Wireless LAN        54 Mbps
PC Card (I/O Word Mode)     62.72 Mbps (7.84 MBps)
PC Card (DMA Byte Mode)     80 Mbps (10 MBps)
100Base-TX LAN             100 Mbps
PC Card (DMA Word Mode)    160 Mbps (20 MBps)
ATA 33                     264 Mbps (33 MBps)
CardBus (Byte Mode)        264 Mbps (33 MBps)
FireWire (IEEE 1394)       400 Mbps
USB 2.0                    480 Mbps
ExpressCard (USB 2.0)      480 Mbps
ATA 66                     528 Mbps (66 MBps)
PC Card (Word Mode)        528 Mbps (66 MBps)
ATA 100                    800 Mbps (100 MBps)
FireWire2 (IEEE 1394b)     800 Mbps
1 Gigabit LAN             1000 Mbps
CardBus (DWord Mode)      1056 Mbps (132 MBps)
ATA 133                   1064 Mbps (133 MBps)
SATA Revision 1.0            1.5 Gbps
ExpressCard (PCI Express)    2.5 Gbps
SATA Revision 2.0            3 Gbps
USB 3.0                      5 Gbps
SATA Revision 3.0            6 Gbps

Gbps = Giga-bits per second
Mbps = Mega-bits per second
MBps = Mega-bytes per second

1 byte = 8 bits
What About RAID?
RAID has received a lot of hype in recent years. RAID works and works well. You can have instant mirroring, so there are always two copies of your data. And the striping process makes reading and writing data a lot faster than with a single drive. Maintenance is easy because the drives are hot swappable.
But the bottom line is, unless you have load of money and you are an IT person, you don't need a RAID system. But in case you qualify for both criteria's, the photo storage solution that I presented above will work even better and safer with a RAID implementation. There are a lot of ways to configure a RAID system, from a basic RAID-0 to a comprehensive RAID-5 system. I will present a minimalist RAID system concept that will support the photo storage solution.
Minimalist RAID
To build a minimalist RAID system on top of the photo storage solution, you will need three hard drives. Set up two of the hard drives in a RAID mirroring configuration. This configuration is your on-site working storage. Whenever you write to one drive, the other drive will be updated immediately with the same information. So, if one drive ever fails, your data on the other drive are still intact. The third drive is for off-site archival backup of your working storage. Once a week, backup your data to the archival drive and store it in a safe off-site location.
Crash!
Brand new drive will fail. In my experience a brand new drive has a higher chance of failing within the first six month than an old drive that has been working for years. Just recently, the brand new Seagate 250 GB parallel IDE drive I purchased for this photo storage solution has completely failed--head clicking on spin up. The drive had only been in service on-and-off for two months.
Luckily for me, the archival drive had over 95% of the data. I had procrastinated on archiving the data from the working drive to the archival for three weeks. So I lost three weeks worth of photographs, including a significant trip to San Diego. But if I haven't had a secondary off-site archival copy, 100% of my data would be lost. So, at least, this photo storage solution worked; it is 95% successful anyway. It could have been closer to 100% success rate if I had stuck to the weekly backup schedule, instead of procrastinating. With the RAID solution I mentioned earlier, success rate could be 100% with minimal labor.
Walmart Saves the Day
As soon as my working drive had a hard physical crash, I became very nervous, because now, I would only have one working copy of my data. If my archival drive also bites the dust, then 100% of my data would be lost! Just the thought of that made my stomach wrench. Although I could wait for a free replacement drive, due to the still active warranty (see the "Warranty" section later) on this virtually new drive, the two weeks wait time is extremely risky to my precious photographs. So the only option is to run out to the store and buy a brand new drive to make a second copy of the archival drive for now. The new drive will then serve as the working drive.
It was Sunday night, just past 7 PM when the hard drive totally failed. In Southern California, most stores closes at 7 PM on Sunday's. What bad luck? My only option then is the 24 hours Wal-mart. I have never bought internal computer equipment at Walmart. I am not even sure that they sell internal computer peripherals. But I ran into Walmart and thank goodness it has internal hard drives on its shelfs. The biggest internal drive is a Seagate 160 GB parallel IDE drive. Although I would rather buy a drive that is at least as big as the drive that failed, 160 GB is big enough for my current data set. And it would be a good interim solution until the replacement drive arrives from Seagate.
Tip
Walmart.com has much bigger internal and external hard drives online.
Anyway, the point I am making in this section is not that Walmart is holy and glory, although it did win some brownie points. The point I'm making here is that the photo storage solution presented in this article is using off-the-shelf components; they are so universal that you can pick up the parts at your local electronics store, including Walmart. Only when you decide to go RAID will you have more trouble finding the right parts.
Warranty
In use for only two months, the Seagate drive is still under warranty. Seagate's support web site is fully automated and you can find out whether your drive is under warranty by typing in the model and serial number. My drive's warranty expires out in 2010! Return and exchange was a piece of cake. No receipt or invoice required. Simply print out the RMA, packing slip, and shipping labels. Then pack and ship off the bare drive. A brand new, or refurbished, 250 GB drive is on its way back from Seagate service center as I type this paragraph.
Related Links
- Converting a SCSI enclosure into a SATA enclosure
- Disk failures in the real world: What does an MTTF of 1,000,000 hours mean to you?
- Hard Drive Healers
- Kingwin
- Kingwin KF-20 HDD Mobile Rack ATA 66/100 - Amazon User Reviews
- Kingwin KF-20 IDE Mobile Rack Insert Tray Only - Amazon User Reviews
- Kingwin KF-91 Beige Aluminum SATA Mobile Rack - Amazon User Reviews
- Kingwin KF-91 Black Aluminum SATA Mobile Rack - Amazon User Reviews
- Maxtor
- Seagate
- Search for "hard disk"
- Amazon
- TigerDirect
- USB Floppy Disk Striped RAID
- Walmart.com

Fun for Photographers
Get Our

Memecoins!
$10000-above
$5000-$9999
$2000-$4999
$1000-$1999
$500-$999
$200-$499
$100-$199
$50-$99
$25-$49
$0-$24
Gift Certificate
