Capturing DV with Microsoft Windows Movie Maker
In this article, we will cover the simple procedure of transferring your video from your camcorder to your computer in DV format. To transfer DV, your camcorder will be connected to your computer via the Firewire (IEEE 1394) cable. If you are not familiar with the camcorder to computer connectivity, take a look at the "Connecting Your Digital Camcorder to Your Computer" article that is elsewhere on this web site.
We will also be using the Microsoft Windows Movie Maker software to perform the DV transfer. Microsoft Windows Movie Maker is freely bundled with the Microsoft Windows XP and Vista operating system. Therefore, it's the prime candidate to use for DV transfer if you use Microsoft Windows.
Because DV is a standard format for video transfer and Firewire is the de facto standard for doing DV transfers, virtually all digital camcorders supports this method. Therefore this article will work with virtually all digital camcorders on the market.
Step 1: Making the Firewire Connection
Before you can perform the transfer, the camcorder must be connected to the computer via the Firewire connectors. At this time, you cannot perform DV transfers any other way. Plug one end of the Firewire cable into the camcorder. Then plug the other end of the Firewire cable into the computer.
After connecting the camcorder to the computer, turn on the camcorder. Your computer will automatically recognize that a component in the "Imaging devices" category is plugged in. If it's a Sony camcorder, the computer will recognize it as a "Sony DV Camcorder". You can see all these device drivers show up in the "Device Manager", but it's not necessary.
Step 2: Pre-Recorded or Live Video
Now, you have to decide whether you want to capture pre-recorded video or live video. If you are transfering DV from your tape, then it's pre-recorded. To transfer pre-recorded video, put the camcorder in VCR (or play-back) mode. On the other hand, if you want to capture live DV (video from the camera lens), then put the camcorder in camera mode.
Step 3: Start Up Microsoft Windows Movie Maker
Through the Start menu, find the Windows Movie Maker menu item. Click on it to start it. After it loads, you will see the following Windows Movie Maker window.
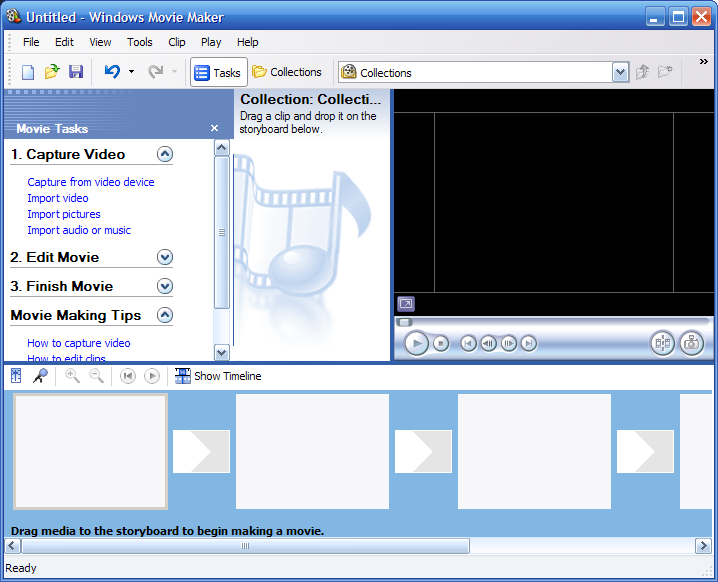
Step 4: Configure the Video Properties
Once the Windows Movie Maker has loaded, it becomes very tempting to click on the "Capture from video device" link. But if you do that now, you may not get the result you expect. That's because the video properties settings might not match your camcorder's recording characteristics.
To change video properties, click on the "Tools" menu. Then select "Options...". Next, click on the "Advanced" tab (see screen shot below) to configure the video properties.

Under the "Video properties" section, you can choose your video format and aspect ratio. Most camcorders sold in the United States uses the NTSC format, while most camcorders sold overseas uses the PAL format. You can determine the format your camcorder uses in its user manual. The aspect ratio determines the size of the video when it's shown on the screen. The aspect ratio depends on how you set-up the camcorder. 4:3 is the classic TV screen. 16:9 is wide screen. You can click on "Learn more about video settings" for more information related to this topic.
After configuring video properties to match your camcorder setting, click the "OK" button to save your settings.
Step 5: Starting the Capturing Process
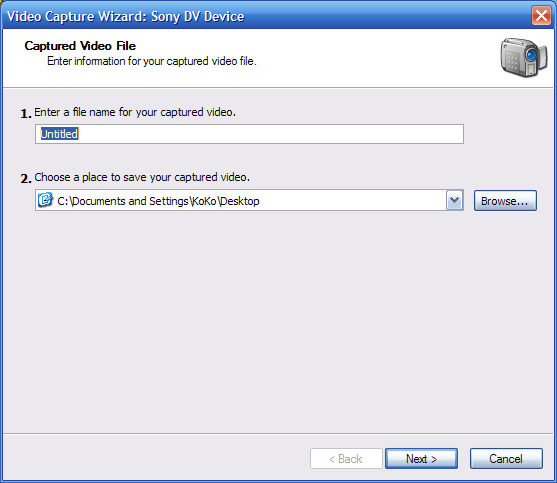
You are now ready to capture the video. Back at the Windows Movie Maker, click on "Capture from video device". The "Captured Video File" dialog will show up (see screen shot below). Type in the name of your video file and choose where to save the file. Click on the "Next >" button to continue.
The "Video Setting" dialog box shows up next (see screen shot below). In this dialog, choose "Digital device format (DV-AVI)". This format preserves the digital video in its purest form. It's quality is good enough for archival purpose, although it will take up quite a bit of space. An hour of Dv will take up 12.62 GB of disk space. So make sure you have plenty available. After selecting the DV setting, move on by clicking on the "Next >" button.

The "Capture Method" screen (see screen shot below) could make your life very easy, or just a tad harder. If you are going to capture the entire tape, you can make your live extremely easy by selecting "Capture the entire tape automatically". This method will rewind the tape for you and capture everything. It's the best way to go if you have many tapes to transfer.
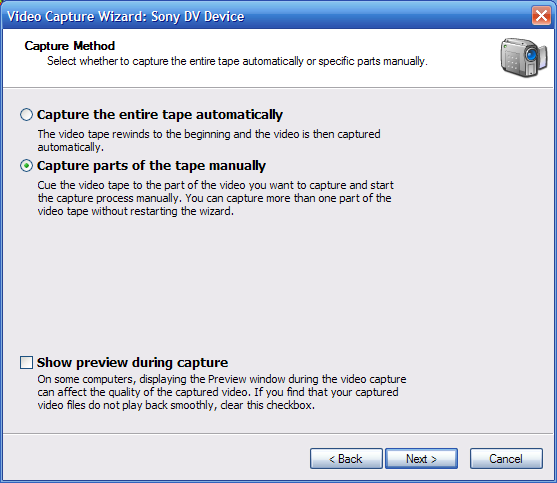
But if you just want a small portion of the tape and you don't mind babysitting the process, choose "Capture parts of the tape manually". In this mode, you have full control of the capturing process. To capture live DV, you'll have to select this method.
The "Show preview during capture" let you see the DV output on your computer while the video is being captured. If you want to enable this, you need to have a very fast computer. I prefer to use the LCD on the camcorder for this purpose, so I usually keep it off.
Click the "Next >" button to continue.
Step 6: Capturing DV
At this point, you will arrive at the "Capture Video" screen (see screen shot below). If you've selected the "Capture the entire tape automatically" earlier, then you don't have to do anything. The computer will be capturing the DV to the file you specified and finish when it's all done. You can use this screen to monitor the progress.
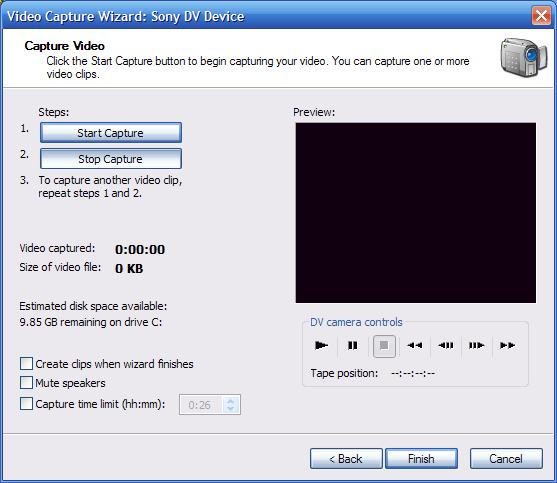
On the other hand, if you selected "Capture parts of the tape manually", this is the control panel for you to perform the capture. I usually uncheck everything on the lower left hand corner. You can either use the "DV camera controls" to move the video tape back and forth, or use the controls built into the camcorder.
At the location where you want to start capturing the video, click "Start Capture". When you've captured what you wanted, click on "Stop Capture".
Use this same process if you are capturing live video, instead of from tape. Although you will get an error, the video will be captured fine. The following is a screen shot of the error message.

"The specified DV device is not responding. Verify that the device is connected properly and turned on, and then try capturing again."
When you have captured all you wanted, click on the "Finish" button. The DV file you specified will be generated and you can proceed to archive it or modify it for your need.
Related Links
143 Users Online
|
Get Our
$10000-above $5000-$9999 $2000-$4999 $1000-$1999 $500-$999 $200-$499 $100-$199 $50-$99 $25-$49 $0-$24 Gift Certificate 
|
|