

![]() Attach
|
Attach
|
![]() Edit
|
Edit
|
![]() Revisions
Revisions
![]() Related Content
Related Content
Macro Photography with What You Got
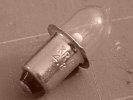
I've noticed a lot of blurry photos on the web, like the photo shown below. Most of these photos are of small objects, where the photographer is trying to capture details of the subject for communication on the Internet (think eBay auction and technical forum messages). Even though most readers can make out the subject in blurry photos, they really put a damper on communication.

The best thing to do, of course, is to spend a lot of money an expensive DSLR camera with a specialized macro lens. But that is simply not cost-effective for one-time macro shots. In this article, I will show you macro photography techniques to capturing everyday objects in a sharp presentable fashion, using the camera that you already have (whether it supports macro or not). The camera can be a non-macro lens on a SLR, a web cam, a SmartPhone, a camera phone, a camcorder, a tablet, or any other camera. The technique is the same.
Step 1: Turn on Macro Mode (if your camera has it)
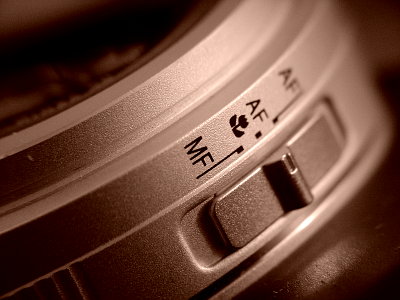
Most digital cameras have a macro mode. It is usually represented by the flower symbol (see photo below). If you haven't noticed it on your camera before, it might be time to read over the user's manual once again. Before you shoot any macro photo, always check to see if you camera has this macro functionality and turn it on! The macro mode allows your digital camera to focus much closer than you normally could.

Even if your digital camera doesn't support the macro mode, you can still capture small objects using the techniques presented in the rest of this article.
Step 2: Get as Close as You Can Without Blurring the Photo
Now you are ready to shoot the photograph. Move your digital camera toward the object. Use the auto-focus functionality to focus on the small object. Usually that's in the center of the image. If your camera can't achieve focus, that means your digital camera is too close to the object. Move the digital camera back and try again. Continue this process until you find that distance that your digital camera can lock focus on the object. That is probably the closest distance your camera focus on the object for a sharp photo. When your camera's auto-focus can lock-on the object, your photo will be clear and sharp.
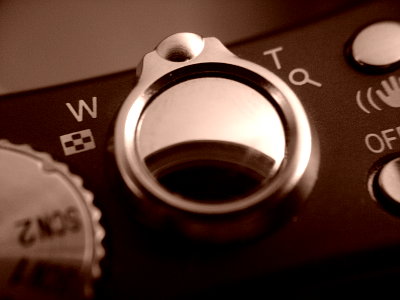
Try the widest zoom angle. Then try the telephoto zoom angle. Some digital cameras can focus really close to the object at the widest angle, while other digital cameras can focus really close at the telephoto angle. Most consumer digital cameras usually provides the closest focus distance and the largest object image at the widest end of the zoom. But you'll never really know unless you give it a try (or unless you read the camera specification very carefully).
Step 3: Shoot the Macro Photo
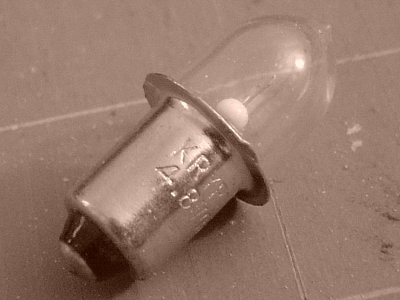
At the closest focus distance, focus and snap the photo. Make sure that the auto-focus has locked-on to the object so that the photo is clear and sharp. Don't worry about extra space around the object that you are capturing; in the next step, we will deal with the extra space. The important part is to capture a clear and sharp photo. The photo below is an example of a clear and sharp light bulb.
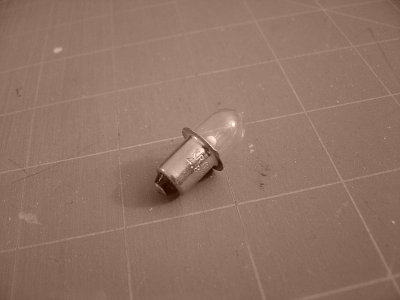
In the photo, the object doesn't fill the entire image frame. Therefore, the photo ended up with a lot of extra space around the object. You can hardly consider it as a macro shot. But, right now, the important part is that you've captured the object clearly.
Step 4: Crop the Photo
If you were able to fill the entire image frame with the object you are capturing, then you don't need to crop the photo at all. But if the image has a lot of extra space, as shown in the previous step, that distracts from the object you are trying to portray, you should crop the photo down so that the object fills the entire image frame as shown in the photo below.

The photo above is not a macro photograph that has been shot separately. It is the exact same photo from the previous step; the one with a lot of extra space. This photo is a tightly cropped version. Cropping is done around the main object in question: the flashlight bulb.
With megapixels digital cameras today, you can still get a very presentable image (especially for web communication) even after tightly cropping your macro image. In this article, I used a 5 megapixel consumer digital camera (Sony Cyber-shot DSC-P92 without any special accessories) to shoot the light bulb. After cropping it, the image still has about 1 megapixels of data. I still had to scale it down to less than half a megapixel to present it to you in this article.
You can crop your macro photograph with the photo software that came with your camera. Or you can download a free photo editing software like Gimp (see "Related Links" section below) for Windows, Linux, or Mac OS.
Related Links
- GIMP - The GNU Image Manipulation Program
- Macro photography
- Macro Photography for Beginners
![]() Attach
|
Attach
|
![]() Edit
|
Edit
|
![]() Revisions
Revisions
![]() Related Content
Related Content
Attachments
- Blurry Light Bulb.jpg (12 KB)
- Flower Symbol.JPG (32 KB)
- Macro Light Bulb thumbnail.JPG (7 KB)
- Macro Light Bulb.JPG (24 KB)
- Sharp Light Bulb with Extra Space.JPG (17 KB)
- Zoom Dial.JPG (25 KB)
603 Users Online
|
Get Our
$10000-above $5000-$9999 $2000-$4999 $1000-$1999 $500-$999 $200-$499 $100-$199 $50-$99 $25-$49 $0-$24 Gift Certificate 
|
|


